Physical Etoys
Introducción
En las últimas décadas, las teorías construccionistas y el progreso tecnológico permitieron que la robótica educativa comience a surgir en algunas escuelas como complemento a diversas materias de la currícula. Sin embargo, cada kit de robótica tiene su manera particular de programarse y no permite la comunicación con otros kits. Es por esta razón que se decidió crear Physical Etoys, una extensión argentina de Etoys que facilita la interacción con estos dispositivos.
“La computadora es un instrumento cuya música son las ideas” Alan Kay

Descripción general del proyecto
Physical Etoys es un ambiente de programación visual de robots gratuito, de código abierto y multiplataforma que conecta el mundo virtual de las computadoras con el mundo real en que vivimos. Con Physical Etoys uno puede programar objetos del mundo real (como robots) para que realicen tareas interesantes, o se puede sensar el mundo real y usar esos datos para controlar objetos virtuales (como dibujos). Es un poderoso software educativo basado en el proyecto Smalltalk que ayuda a los niños a explorar su propia creatividad combinando ciencia y arte en un laboratorio infinito.
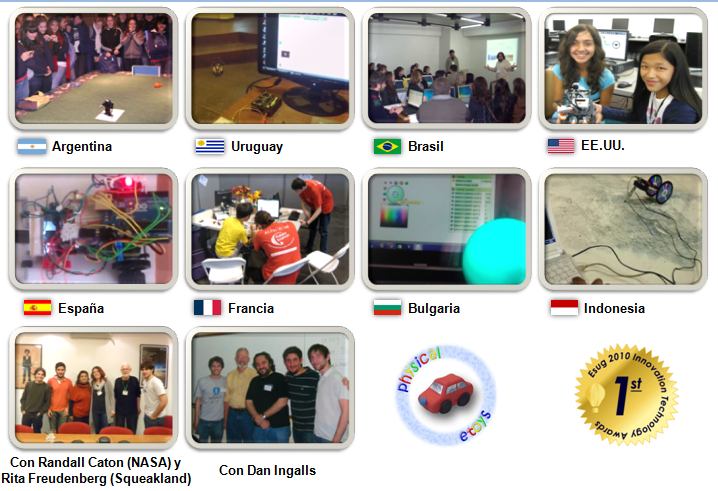
Physical Etoys ganó el primer puesto en los Innovation Technology Awards 2010, otorgado por el grupo europeo de usuarios de Smalltalk y es utilizado en varios países.
Resultados deseados
- Facilitar la programación de material concreto así como también su enseñanza.
- Integrar los kits más populares de robótica educativa en un solo ambiente extensible.
- Fomentar el pensamiento computacional.
Descarga
|
|
Physical Etoys 2.1.2 para Windows |
|
|
Physical Etoys 2.1.2 para Linux |


Para usar Arduino, deberías también instalar los compiladores AVR. Simplemente abrí una terminal y realizá los siguientes comandos (para Ubuntu):
- sudo apt-get install gcc-avr
- sudo apt-get install avr-libc
Extendiendo Physical Etoys
Physical Etoys posee un diseño modular. Cada módulo está representado por un archivo de extensión .pem (physical etoys module) y permite la interacción con un robot o un kit. Physical Etoys viene por defecto con los módulos de Lego NXT, Arduino y Duinobot. Para agregar otros robots a tu ambiente, es necesario instalar otros .pem que se encuentran a continuación. Los archivos .pem se instalan automáticamente con solo descargar el archivo deseado a la carpeta en donde se encuentra Physical Etoys. Al abrirlo, si aparece alguna pregunta, se contesta en forma afirmativa.
Los módulos disponibles son los siguientes:
- Femisapien (Windows XP en adelante)
- Isobot (Windows XP en adelante)
- Kinect (Windows 7 en adelante. Requires the SDK)
- Lego Dacta Control Lab (Windows XP en adelante)
- Puerto paralelo (Windows XP en adelante)
- Roboquad (Windows XP en adelante)
- Robosapien (Windows XP en adelante)
- Sphero (Windows XP en adelante)
- Wiimote (Windows XP en adelante)
- Leap Motion – (Windows 7 en adelante. Requiere el driver)
- Tobii EyeX Tracker – Nuevo! (Windows 7 en adelante. Requiere el driver y USB 3.0)
Código fuente
Physical Etoys fue desarrollado en Smalltalk, un lenguaje dinámico de programación orientada a objetos. Si no conocés Smalltalk, te recomendamos que te des una oportunidad para probarlo. Una de las mejores maneras de aprender Smalltalk es bajándose una versión de Smalltalk (nosotros recomendamos comenzar con Squeak o con Pharo, instalarla y tomar cualquiera de estos libros.
Si ya estás familiarizado con Smalltalk, te recomendamos que veas el código fuente de Physical Etoys y, si tenés ganas, podés contribuir con tu código al proyecto. Agradeceríamos muchísimo tus contribuciones.
Physical Etoys es la unión de varios módulos. Para conseguir el código fuente de cada uno de los módulos, dejamos a continuación los links a los repositorios:
- Physical Etoys
- Femisapien
- Duinobot
- Isobot
- Kinect
- Lego Dacta Control Lab
- Puerto Paralelo
- Roboquad
- Robosapien
- Sphero
- SqueakNXT
- Wiimote
- Arduino
Licencia
Physical Etoys y todos sus módulos se encuentran bajo licencia MIT. Notá que Physical Etoys puede incluir software de terceros que tengan una licencia diferente que la MIT.
Material anexo
Tutoriales
Videos
Clickeá acá para ver algunos videos!
Introduction
In recent decades, the constructionist theories and technological progress allowed educational robotics begin to emerge in some schools as a complement to various areas of the educational curricula. However, each robotics kit has its own way of interaction and does not allow the communication with other kits. In order to facilitate interaction with these devices, we decided to create an Etoys extension: Physical Etoys.
“A computer is an instrument whose music is ideas” Alan Kay
General description of the project
Physical Etoys is a free and open-source visual programming environment that connects the virtual world of computers with the real world in which we live. With Physical Etoys anyone can program real-world objects (such as robots) to perform interesting tasks, or can sense the real world and use that data to control virtual objects (drawings). It is a powerful educational software based on the Smalltalk project. It helps children explore their own creativity by combining science and art in an infinite laboratory.
Physical Etoys won first place at the Innovation Technology Awards 2010 awarded by the European Smalltalk User Group and it is used in several countries.
Desired outcomes
- Facilitate the teaching and the programming of physical material.
- Integrate the most popular robotic kits in one extensible environment.
- Encourage students to develop computational thinking.
Download
|
|
Physical Etoys 2.1.2 for Windows |
|
|
Physical Etoys 2.1.2 for Linux |
In order to use Arduino you should also install the avr compilers. Just open a terminal and evaluate the following commands (for Ubuntu):
- sudo apt-get install gcc-avr
- sudo apt-get install avr-libc
Extending Physical Etoys
Physical Etoys has a modular design. Each module is represented by a .pem file extension (physical etoys module) and allows interacting with a robot or a kit. Physical Etoys comes with the Lego NXT, Arduino and Duinobot modules by default. To add other robots to your environment, you must install other .pem’s found below. The .pem files can be installed automatically by downloading them to the folder which contains Physical Etoys. When opened, if a question appears, answer with a “yes”.
These are the available modules:
- Femisapien (Windows XP or later)
- Isobot (Windows XP or later)
- Kinect (Windows 7 or later. Requires the SDK)
- Lego Dacta Control Lab (Windows XP or later)
- Puerto paralelo (Windows XP or later)
- Roboquad (Windows XP or later)
- Robosapien (Windows XP or later)
- Sphero (Windows XP or later)
- Wiimote (Windows XP or later)
- Leap Motion – (Windows 7 or later. Requires the driver)
- Tobii EyeX Tracker – New! (Windows 7 or later. Requires the driver and USB 3.0)
Source code
Physical Etoys has been developed in Smalltalk, a dynamic object oriented programming language. If you’re new to Smalltalk we strongly recommend you to give it a try. One of the best ways to learn Smalltalk is to download one of the versions of Smalltalk (we recommend you to start either with Squeak or Pharo), install it, and grab a copy of one of the many free online Smalltalk books.
If you’re already familiar with Smalltalk we encourage you to take a look at Physical Etoys’ source code and, if you feel like it, contribute some of your own code to the project. We would highly appreciate your contributions.
Physical Etoys is the compilation of several different modules. To get the full source code, please go to each project page listed below and follow the instructions.
- Physical Etoys
- Femisapien
- Duinobot
- Isobot
- Kinect
- Lego Dacta Control Lab
- Parallel port
- Roboquad
- Robosapien
- Sphero
- SqueakNXT
- Wiimote
- Arduino
License
Physical Etoys and all of its modules are under MIT license. Please note that Physical Etoys may include third-party software components with a different license than MIT.
Appendix material
Tutorials
Videos
Click here to see some videos!
- GIRA » Blog Archive » Coming soon…
- GIRA » Blog Archive » Physical Etoys released!
- #doesNotUnderstand: » Blog Archive » links for 2010-03-02
- Chemie und Informatik in der Schule » Blog Archive » Physical Etoys
- Physical Etoys « Ideas for Teaching Computer Technology to Kids
- Welcome to the Real World – Kinect in Squeak « The Weekly Squeak
- Physical Etoys 2.0 released « The Weekly Squeak
- Hardware Hacking With Squeak « The Weekly Squeak
- Physical Etoys | Profesorado Arduino
- Physical Etoys » PROFESORADO ARDUINO MÁLAGA
- Journée LinuxEdu 2012 : samedi 16 juin | LinuxÉdu : blog
- Compte-rendu : journée LinuxÉdu et assemblée générale du 16 juin 2012 | LinuxÉdu : blog
- Arduino et enseignement, 3 juillet 2012 : compte-rendu | LinuxÉdu : blog
- Physical Etoys sans câble USB | LinuxÉdu : blog
- Etoys « /home/GNU/Linux/Ramix
- LinuxÉdu | Concours de robot au collège
- LinuxÉdu | Réunion de travail Robuino
- Robots o el sueño eterno de las maquinas inteligentes | Estado Beta
- Physical Etoys y Lego Mindstorm NXT | Lo que sé de Robótica Educativa
- 5 entornos gráficos para Arduino | robologs
- Links d’interés #edutictac (weekly) - Planeta EduTicTac
- Robots o el sueño eterno de las maquinas inteligentes | En Estado Beta
- Designoteca » Robótica livre no Forum de Software Livre de Porto Alegre – FISL 15
- LinuxÉdu | Compte-rendu : journée LinuxÉdu et assemblée générale du 16 juin 2012
- Mis primeros pasos con Arduino « BetaWeblog
- Physical Etoys y Arduino « BetaWeblog

#1 by gustavo on 24/Oct/2011
Hola como hago para instalar phisycal etoys en win , me dice que no reconoce el formato del archivo
#2 by Sebas on 8/Nov/2011
Hola Gustavo. Es muy probable que tu pc no tenga un programa para descomprimir los archivos .rar. Te recomiendo que te bajes un programa como el WinRar.
Lo podés bajar acá: http://www.winrar.es/descargas
#3 by dian on 10/Nov/2011
Dear Sir, thank you for your excellent software, I want to ask, if Physical Etoys supports Arduino uno?
#4 by Richi on 12/Nov/2011
Hi dean, IIRC the only problem with Arduino UNO is related with the automatic uploading of Firmata. It will be fixed in the next version, but for now you can bypass this bug by using the Arduino software to upload StandardFirmata. Once Firmata is in the board you can use Physical Etoys without problems.
#5 by dian on 13/Nov/2011
thank you very much for the reply, yes, after I upload StandardFirmata, now my arduino uno has connected with Physical Etoys, I will use it to teach my students, once again thanks a lot.
#6 by Martin on 21/Nov/2011
Quisiera saber si es compatible con la placa Arduino Mega 2560.
Muchas Gracias
#7 by Martin on 21/Nov/2011
Hola estoy teniendo un error con el physical que apenas lo arranco me dice «error a primitive has failed» o según si abro el wii mote o la placa arduino me dice por ejemplo «error this collection is empty».
Ojala puedan ayudarme ya que no se a que se debe y es bastante molesto que aparezca todo el tiempo.
Mi windows es de 64 bits no se si `puede llegar a influir eso.
Saludos y gracias
Martín
#8 by Richi on 2/Dic/2011
Hola Martin, ahora no tengo acá una Arduino Mega 2560 pero la última vez que probé tenía el mismo problema que la UNO: no funciona la instalación de Firmata. Sin embargo, si le cargás Firmata con el IDE oficial de Arduino, debería andar sin problemas.
Con respecto a 64 bits, mi compañero Sebastián lo probó y tampoco tuvo problemas.
¿Qué versión de Physical Etoys estás usando? Nos podés mandar una captura de pantalla del error?
Gracias,
Richo
PD: Te recomiendo que te comuniques con nosotros via e-mail (buscalos en la página «Nosotros») porque los comentarios del blog solemos revisarlos muy de vez en cuando…
#9 by Verónica on 29/Dic/2011
Hola,
estoy tratando de conectar la placa UNO con EToys. Bajé el firmata de esta misma página, seguí los pasos del Readme, pero en EToys me dice «Error: error del sistema» o bien «Error: a primitiva has failed». ¿Qué puede estar fallando?
Gracias!
#10 by Richi on 30/Dic/2011
Hola Verónica,
¿Pudiste instalar StandardFirmata usando el IDE de Arduino (http://arduino.cc/en/Main/Software)? Como le dije a Martin, la instalación automática de Firmata no funciona con la placa UNO en la versión actual. Es un problema que ya está solucionado y va a salir en la próxima versión muy pronto.
Con respecto al «Error: a primitive has failed», eso suele suceder cuando el puerto elegido no es el mismo en el que está conectada la placa. Podés fijarte cual es el puerto correcto siguiendo las instrucciones del tutorial (por si todavía no lo viste: http://tecnodacta.com.ar/gira/Tutorials/Spanish/Arduino_es.pdf). Este error también está solucionado y en la próxima versión elegir el puerto incorrecto no va a dar error.
#11 by Verónica on 1/Ene/2012
Me olvidé de comentar que estoy con la versión 1.7 de Physical EToys.
#12 by Verónica on 3/Ene/2012
Ya está, gracias!! Me faltaba ejecutar desde Arduino el StandardFirmata, pero no el «de siempre», sino el especial para UNO 2_2. Ahora EToys me la reconoce. Gracias nuevamente!!!
#13 by Richi on 3/Ene/2012
Bien! Me alegro que lo hayas solucionado.
#14 by Mario on 9/Mar/2012
Hola, soy un maestro y pregunte si usted puede traducir el programa uil en italiano.
gracias
#15 by Richi on 11/Mar/2012
Hola Mario, mucho gusto.
El programa se puede traducir al italiano, pero necesitamos voluntarios que ofrezcan su tiempo para traducirlo.
Ayudar es muy sencillo: simplemente hay que entrar a: http://translate.sugarlabs.org/it/etoys_new/ y empezar a traducir 🙂
Gracias,
Richo
#16 by Ken on 24/Mar/2012
Trying to load «StandardFirmata» via Arduino IDE, but getting errors «previous declaration of ‘void __cxa_pur_virtual()’ with ‘C++’ linkage» in Arduino 0017 and «‘TOTAL_DIGITAL_PINS’ was not declared in this scope» in Arduino 0022 & 1.0.
Any ideas?
Thanks
#17 by Richi on 25/Mar/2012
Hi Ken,
If you’re using the Arduino IDE, I would recommend you asking in the arduino forum (http://www.arduino.cc/forum/) or the Firmata mailing list (https://lists.sourceforge.net/lists/listinfo/firmata-devel). They’ll probably give you a solution to your problem much better than we can do.
Cheers,
Richo
#18 by anindito on 22/Abr/2012
i want to download physical etoys 1.8.1 not 2.0.0
#19 by Richi on 22/Abr/2012
Hi, I restored the links for the older versions. Sorry for that.
May I ask why do you need that specific version?
#20 by Monica Torres on 11/May/2012
Existe Physical Etoys para Mac?
Gracias
#21 by Richi on 16/May/2012
Hola Mónica (y perdón por la respuesta tardía).
No, actualmente no existe Physical Etoys para Mac.
Saludos,
Richo
#22 by Monica Torres on 18/May/2012
Muchas gracias por la respuesta. Saludos.
#23 by José González on 21/May/2012
Hola bajé para Linux Ubuntu las versiones 1.7 y la 2, y ambas no permiten abrir y/o guardar un proyecto ¿¿¿??? 🙁
Sí lo logré bajando la versión para windows y corriéndola con el wine, esto en una notebook con ubuntu 12.04 64 bits
de todos modos Felicitaciones por el esfuerzo y por el proyecto !!!
#24 by Richi on 23/May/2012
Hola Jose, muchas gracias por informarnos del error. Vamos a ver qué podemos hacer para solucionarlo cuanto antes.
Respecto a Wine, cuando lo probé (hace ya tiempo) no pude configurarlo para que vincule los puertos serie en linux.
Mis conocimientos de linux y de wine son casi nulos, así que no descarto la posibilidad de hacerlo andar en wine, pero yo por lo menos no pude hacerlo.
Saludos,
Richo
#25 by José González on 26/May/2012
Richo y demás, logré cargar un proyecto y salvarlo en Linux, para eso creé con permisos de root una carpeta en el raíz con permisos para «todos» para «leer y escribir «.
Sigo probando otras alternativas
Saludos
#26 by José González on 26/May/2012
el problema (original) es que no puede acceder a la carpeta personal
por ejemplo no accede al
/home/jose
#27 by Alfonso on 20/Jun/2012
Buenas tardes,
me gustaría conocer si la versión 2.0 para Linux presenta una compatibilidad o funcionalidad inferiores a la versión 1.7, la cual aparentemente tiene, al menos, más acceso directos dentro de la parte principal del propio Physical Etoys.
Un Saludo y gracias por vuestro trabajo
#28 by Richi on 20/Jun/2012
Hola Alfonso,
Por el contrario, la versión 2.0 para Linux tiene mucha más funcionalidad que la 1.7.
El tema con los accesos directos, que nosotros llamamos «escarapelas» :), es que en la versión 2.0 (tanto para windows como para linux) decidimos eliminar los robots menos importantes para dar prioridad a las plataformas más populares: Arduino y Lego Nxt.
De todos modos, si bien en la versión 1.7 estaban todas las escarapelas, no todos los robots funcionaban en linux. Ahora ambas versiones (windows y linux) son mucho más compatibles entre sí, pues tanto Arduino como Lego Nxt funcionan casi al 100% en ambos sistemas operativos.
Saludos,
Richo
#29 by Jordi Navarrete on 26/Jun/2012
Hola compañeros.
Os envie un mesaje ya hace tiempo, para pedirles permiso para poder traducir al catalan sus informes.
Tras varias enfermedades, que han retrasado unos meses las traducciones. ¿Donde os lo envio? Para que me deis vuestra aprobación por escrito para poderlo incluir por en mi proyecto fin de carrera.
#30 by ricardo castillo on 30/Jul/2012
Hola baje su aplicación y es justo la que requiero para aplicar con mis chicos.
Encontré las siguientes dificultades:
No encuentro en la carpeta los led, resistencias y demás.
Al conectarme n logro activar las salidas del arduino.
Con mis chicos se desarrollo una placa diferente a arduino la cual quisiera incluir en su proyecto.
Gracias.
#31 by Richi on 30/Jul/2012
Hola Ricardo,
Para encontrar los leds y demás componentes tenés que hacer click en alguno de los pins del arduino y elegir del menú.
¿Cuando tratas de conectar te da algún error o algo que nos pueda dar una pista de por qué no te anda? qué sistema operativo estás usando? qué tipo de arduino?
Respecto a la placa que desarrollaron, me temo que si no es compatible con Arduino no se va a poder incluir tan fácilmente. En algún momento deberíamos agregar un mecanismo que permita extender el sistema sin modificar el código, pero por ahora eso no existe.
Gracias por tu mensaje y te sugiero que me respondas a mi mail (buscalo en la página «Nosotros») así vemos de solucionar tu problema.
Saludos,
Richo
#32 by chris thompson on 16/Ago/2012
Do you think physical etoys could be ported to Android? It would be incredible for kids to develop programs on a tablet using the etoys environment to control real world objects such as sphero or the ioio board via bluetooth from an Android tablet.
#33 by dian on 21/Ago/2012
Dear Richi, thank you for a really great software, it is really very helpful in making learning in school. I want to ask, instead of using bluetooth, can we use xbee to make wireless connection to arduino and physical etoys? thank you very much for your reply.
#34 by Richi on 21/Ago/2012
Hi Chris,
I agree it would be a great idea to port Physical Etoys to Android but, unfortunately, I know of no one that is working on that currently.
I’m not sure how difficult would be, though. I think we need to finish supporting Linux first (specially for the XO), and then see what it takes to port to Android. I bet it would require some major interface re-design in order to make it usable in a touchscreen. A simpler idea would be (maybe) to just implement an interpreter that would let you run Physical Etoys scripts from your phone or tablet, thus using it as the controller of your robot.
In any case, it’s not yet in our agenda, but if someone wants to take the time to implement it, we’ll be happy to integrate it 🙂
Cheers,
Richo
#35 by Richi on 21/Ago/2012
Hi Dian,
I guess Xbee could be used to communicate with arduino but I really don’t know what changes should be made on the code to enable that.
Cheers,
Richo
#36 by Peter Hart on 31/Ago/2012
Hi Richi, thanks for an awesome new toy to play around with!
I have a couple of questions, and one problem that I’m seeing with my current configuration.
I have an Arduino UNO (R3, I think). I’ve tried connecting up a photoresistor to the analog ports, but I’m not seeing any changes to the ‘light intensity’. When I run the firmata test executable, it can however see changes in the intensity of the signal when I e.g. shine a flashlight on the photoresistor. Is there something I can look for for troubleshooting (logs, etc), or something that I need to enable. I find that I can get an LED to turn on/off, so it seems that it is connecting to the board.
I’ve tried multiple different ports. The photoresistor is serially connected to a 10k Ohm resistor, and the analog pin is connected between them – as I said, I can see changes in the intensity in the firmata test executable, when I alter the light falling on the photoresistor. I’m running windows 7 64 bit, and I think it’s firmata 2.1 I have loaded (the version that comes with the arduino 1.0.1 environment). Any hints would be appreciated!
As to the questions – first, is there any way to default the connection to ‘firmata’? I’ve looked, but don’t see the usual option to save the image (that I remember from playing around with squeak a long time ago when OpenCroquet was first available), and when I load a project it always seems to load in ‘direct’ mode, even if I save in ‘firmata’ mode?
Second, I just received a Rasperry PI. Do you have any idea if it will physical etoys will work on it (to control the arduino, at least initially)? Are there any customizations to the Squeak VM, or is it a standard VM (if it is, then I think the chances are that it can be made to work relatively easily, as I think all the arduino support is available, but if not, well, I’ve never tried to build a custom squeak VM…)
Thanks again,
-Pete
#37 by Richi on 2/Sep/2012
Hi Peter,
It’s been a while since I used the «firmata» mode so you might have encountered some bugs. I don’t have an arduino here to test it but I’ll see if I can reproduce your problem on monday.
May I ask, though, why don’t you use the «direct» mode?
You can’t set the default connection mode to «firmata», but when you load the project it should start with the same configuration you save it. So it seems like a bug.
As for the Raspberry Pi, we don’t have one to play yet but Physical Etoys uses the standard Squeak VM so I guess it’s only a matter of compiling it on the ARM and try it out. If you do it, please let us know your results 🙂
Cheers,
Richo
#38 by Verónica on 6/Sep/2012
Hola chicos!
Quisiera hacerles una consulta:
siguiendo con unas docentes el tutorial de Arduino, intentamos mover un motor con el rectángulo, pero (con todo bien conectado) salta el siguiente error:
«Write Comm failed (2) – El sistema no puede encontrar el archivo especificado». Me gustaría mandarles una imagen de la conexión, pero todo parece estar OK. ¿Sugerencias? ¡Gracias!
#39 by Richi on 25/Sep/2012
Hola Verónica, perdoná la demora en la respuesta pero, como te podrás imaginar, andamos bastante ocupados este último tiempo.
Respecto a tu problema, la verdad no pude reproducirlo en la última versión de Physical Etoys.
¿Podrás mandarme un poco de información más detallada de lo que están haciendo? Sobre todo: versión del programa, sistema operativo, capturas de pantalla, foto de la conexión física, pasos para reproducir el error, etc. Todo lo que se te ocurra viene bien.
Otra cosa, para evitar otra demora como ésta te recomiendo comunicarte directamente a nuestros mails que esos los chequeamos constantemente y es menos probable que nos olvidemos de contestar alguno.
Gracias,
Richo
#40 by Butler on 1/Oct/2012
is there a library or something i am missing, when try to connect the arduino to the program there is no «electronics» sub folder, the arduino is listed alphabetically but no other electronics seem to be there
#41 by Richi on 1/Oct/2012
Hi Butler,
You’re right, there is no «Electronics» category in the object catalog anymore. We’ve made a few changes in Physical Etoys 2.0 but we didn’t update the tutorials yet. Sorry for the inconvenience.
As you already noticed you can get the «Arduino board» by listing the objects alphabetically, and you can also find it in the «Physical Etoys» category and the «Physical Etoys» flap (it appears when you move the cursor near the bottom of the screen). However you won’t find any other electronic device. We decided to remove them from the object catalog in order to avoid cluttering it with a lot of different objects that serve no purpose unless they are attached to an arduino board. Nothing is lost, though, you can always get any electronic device by clicking on the arduino pin on which you want to attach it and then choosing from the pop-up menu.
We believe clicking the arduino pin is a much easier way to attach devices than getting them from the catalog and dragging the wire from the device to the pin. I don’t know why we wrote the tutorial using the least preferable way, though.
In any case, we need to update the tutorials to reflect all the changes done in Physical Etoys 2.0, but we currently don’t have the time to do it so if someone wants to step up and contribute with this very important task it would be really awesome 🙂
Cheers,
Richo
#42 by beatriz on 11/Oct/2012
Hola , tengo un problema con mi tarjeta UNO cuando intento instalar mi controlador manualmente me sale un error ..¨WIndows encontro el software de controlador para el dispositivo, pero se produjo un error al intentar instalarlo ¨
¨El sistema no puede encontrar el archivo especificado¨
y cuando trato de bajar un programa ejemplo a la tarjeta desde otro pc , si me lo detecta pero me sale un error parecido a este
avrdude: stk500_getsync(): not in sync: resp=0x00
no se si me podrian ayudar 🙂
#43 by Richi on 12/Oct/2012
Hola Beatriz, te recomiendo buscar en Internet que hay varios tutoriales paso a paso sobre como instalar los drivers de la Arduino UNO en windows.
Fijate por ejemplo, acá: http://www.arduino.cc/en/Guide/Windows#toc4.
Lo mismo, éste también es muy bueno: http://www.ladyada.net/learn/arduino/lesson0-win.html.
Espero que te sirva. Saludos,
Richo
#44 by Luis on 16/Oct/2012
Hi Richo,
I’m trying to use first Physical Etoys with Sphero Ball, but I can not get any results, despite the connection on port com3 shown as true. Could You send me a sample project with Sphero so I learn from him?
Thank you,
Luis
#45 by Richi on 16/Oct/2012
Hi Luis, I uploaded to my dropbox a simple project to move the sphero ball using a joystick: https://dl.dropbox.com/u/43706148/SpheroJoystick.004.pe
Please tell me if that works for you.
Cheers,
Richo
#46 by dian on 8/Dic/2012
Dear Richi,
thanks for a very interesting software, I just know the functions of these three modes, namely direct, compiled and firmata. And by making mode to firmata, I’ve managed to connect Etoys with arduino wirelessly through bluetooth or xbee, with previous upload standardfirmata to arduino memory, and set xbee or bluetooth baudrate to 57600. The problem is, why when using standardfirmata, pin analog value is always 0 or in other words, the firmata can not read an analog signal? What code needs to be added to the standardfirmata? Thank you for your help.
#47 by Richi on 11/Dic/2012
Hi Dian. Great work! I believe you’re the first to connect Physical Etoys with arduino wirelessly. If you want, it would be even greater if you had a blog post, a video, a tutorial, or something about it so that we (and anyone interested) could follow your steps :).
Regarding the Firmata problem with analog inputs, I believe it’s a bug on our client Firmata implementation. I’ll see if I can fix it soon.
Cheers,
Richo
#48 by dian on 12/Dic/2012
Thank you Richi, yes I will make the blog soon
#49 by Richi on 14/Ene/2013
Hi Dian, I’ve fixed the analog input issue with our Firmata client. Sorry for the long wait.
It’ll be available in the upcoming release.
#50 by Eduard on 11/Feb/2013
Felicidades por vuestro trabajo. Tengo una duda, estoy utilizando physical con arduino uno y no soy capaz de especificar tiempo a las acciones de los servos y motores. ¿existe la opción?.
Un saludo.
Eduard
#51 by Richi on 18/Feb/2013
Hola Eduard,
A diferencia de otros lenguajes de programación, en Etoys normalmente se programa pensando en qué cosas hacer a cada paso y no en una serie de acciones secuenciales ligadas a una duración. Por eso el «loop» es implícito al ejecutar un guión, es casi como si todos los bloques en un mismo guión se ejecutaran al mismo tiempo.
Si necesitás programar un serie de acciones que tienen que ejecutarse en un tiempo determinado podés usar el slot «temporizador» del Mundo o representar gráficamente el avance del tiempo como en el reproductor de una película. Te paso 2 proyectos para que veas cómo puede hacerse esto que te digo:
https://dl.dropbox.com/u/43706148/Temporizador.001.pe
https://dl.dropbox.com/u/43706148/NedroidComic3.007.pr
Saludos,
Richo
#52 by Thomas T. Soares on 7/May/2013
Do you know about the http://fisl.org.br ?
We have a lot of activities about «robotica libre»…
You should submit proposals of lectures here !
#53 by gzabala on 7/May/2013
Yes Thomas, we went to fisl two years ago, and we gave a lecture! Thank you very much!
#54 by Alno04_fr on 5/Jun/2014
Hello Richi,
I have just installed your PE 2.1.1 Windows version. No problem to connect a NXT 2 on USB port. But, when opening the objects catalog, category «Physical Etoys», i only find «Nxt brick» element. Where can i find sensors, motors etc ?
Thanks so much for your answer and for your great work, very usefull for young people… I’m a french teacher and i want to use PE with my pupils… Alain
#55 by Richi on 5/Jun/2014
Hi Alain,
You can find the motors by clicking on the ports A, B, C in the Nxt brick. And the sensors by clicking on the ports 1, 2, 3, 4.
Good luck with your classes!
Cheers,
Richo
#56 by Alno04_fr on 7/Jun/2014
Hi Richi,
Thanks for solution. Another question : With PE, I manage to use NXT colors RGB sensors. In your opinion, is it possible ? If yes, how can I do it?
Thanks one more a time for information.
Cheers,
Alain
#57 by Richi on 13/Jun/2014
Hi Alain, I’m sorry but currently PE doesn’t support RGB sensors. We’re planning on adding it but I haven’t found the time to implement it yet.
#58 by Alain on 23/Jul/2014
Hi Richo,
I have a problem with the compiled mode of my PE. I have yet updated the firmware of the brick(0.9.1 rev.6596, the latest version). Whith the example «DodgeWalls», when I try to download the main script «avoidObstacles», the Nxt display an error message : «Exception : 16 at :120:01». In your opinion, what’s wrong ?
Thanks again for answering.
Cheers,
Alain
#59 by Alain on 24/Jul/2014
Richo,
Sorry, the exact error message is :
«Exception : 16
at : 120:81»
In fact, I can’t download any PE script in compiled mode… Is my Nxt brick defective ?
Alain
#60 by Kirk W. Fraser on 7/Sep/2014
I downloaded Physical Etoys and easily got my webcam display. But how do I work with it to get my software to know what it is looking at? How do I access a Smalltalk browser? And since Lego Nxt 2.0 is a discontinued product, how can I create a project using a Parallax microcontroller? Thanks.
#61 by Richi on 10/Sep/2014
Hi Alain, I’m very sorry that I missed your comment for so long. Unfortunately, for the NXT compiled mode we rely on Not eXactly C (http://bricxcc.sourceforge.net/nbc/) so I really don’t know what is going on there.
#62 by Richi on 10/Sep/2014
Hi Kirk, I don’t know what you are trying to do but if you’re a Smalltalk programmer you can access a browser by using the keyboard shortcut Alt+b (or maybe Ctrl+b). Etoys has these development tools hidden for normal users but they’re easy to find (maybe in a future version we should make it easier).
Physical Etoys doesn’t support Parallax microcontrollers yet (and it’s not in our plans) so if you want to use it you’ll have to implement it yourself. Sorry.
As for the webcam I don’t really understand your question. Image processing is not a trivial task and in Physical Etoys you can only make some very basic things, as demonstrated here: http://tecnodacta.com.ar/gira/2014/09/analisis-de-imagenes-en-etoys-parte-1/.
#63 by jorge on 16/Sep/2014
Hola a todos, quien podría ayudarme con el proyecto de «Mendieta – Plataforma de hardware de bajo costo para la robótica educativa en netbooks CI», ya que en el video se ve muy sencillo pero no creo que lo sea tanto, estoy en segundo año de la carrera de sistemas informaticos y realmente me interesa muchisimo el proyecto, prodrían ayudarme.
De antemano les agradezco por el aporte.
#64 by Richi on 16/Sep/2014
Hola Jorge, el proyecto Mendieta todavía está en desarrollo pero muy pronto vamos a subir toda la información al blog. Paciencia 🙂
#65 by Jean Christophe on 14/Oct/2014
Buenos días, soy profesor de tecnología e informática en un colegio en Francia (con alumnos entre los 11 y los 15 años). Suelo utilizar Physical Etoys con mis alumnos desde hace varios años y me encanta totalmente este programa, y les gusta mucho también a los alumnos en general. Además nos permite realizar muchas maquetas como por ejemplo una persiana automática , una cerradura con mando codificado, un invernadero, una estación de bombeo, una barrera de aparcamiento, una puerta de gallinero etc. El modo compilado añade otras posibilidades (aunque no lo domino totalmente) y tenemos otros proyectos que corren. Como no hablo bien ni el inglès ni el español, nunca había escrito comentarios hasta hoy pero es con la ayuda de un colega que le mando la enhorabuena por su programa. Sin embargo, quería llevar a su atención un problema que encuentro en el uso de Physical Etoys con Linux (Unbuntu todas versiones), ya que todos los efectos sonores así como la video resultan imposibles mientras que con Etoys, ha de funcionar.
Muchas gracias otra vez
#66 by Alno04 on 12/Nov/2014
Hello Richi,
I am back on my problem of downloading scripts in compiled mode for NXT. See message #58. I guess compiling with NBC is Ok. I saw in a Lejos forum that the error (exception 16 at 120:81) is due to a communication failure under LCP protocol. Do you know somebody able to help me finding a solution ?
Thanks in advance for all…
Regards,
Alain
#67 by Mario on 22/Abr/2015
Estimado Richisical. : Te estoy escribiendo desde Uruguay, mis alumnos quedaron muy embalados con el taller que dieron en la Olimpiada Ceibal y este año quiero que ellos programen con arduino y physical etoys. Te cuento que estamos usando S4A y que bueno que es compatible. necesito que me digas como lo instalo con el ubuntu de plan ceibal.